Updated 02/05/2021
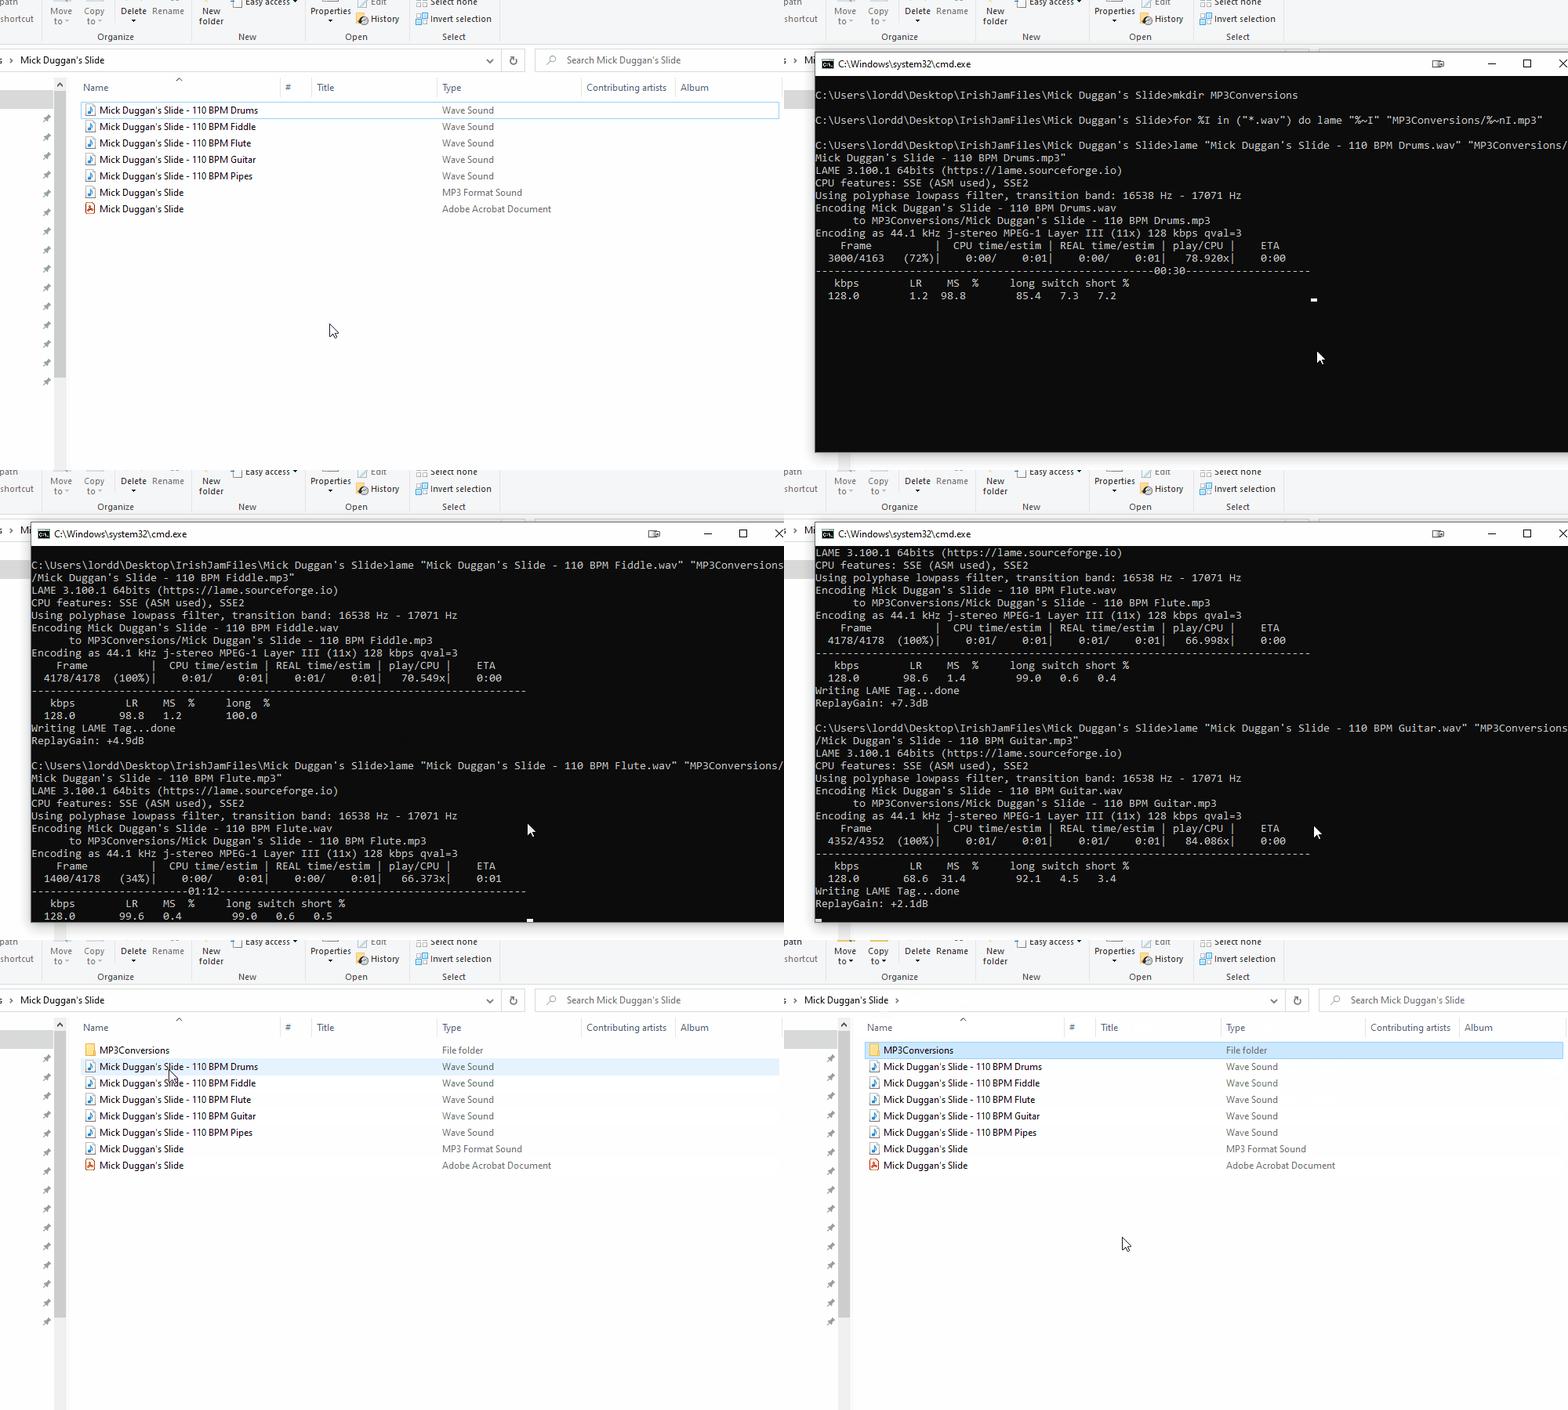
Behold, Windows users: “Convert All WAV to MP3”!

A simple, lazy script that will save you a trip to Audacity… or even possibly a simpler method. 🙃
This dead-simple script does one thing quite well: it converts all WAV files in the directory you right-click in to MP3, non-recursively. (I do mention a recursive version below, with a caveat.)
A warning before we get into this tutorial: we will be editing registries. If that doesn’t scare you, I nonetheless advise you to back them up in case something goes wrong.
Let’s dive in.


(If you don’t care why I made this, click here for the tutorial.)
The why
You may have read in my About page that I was in an Irish band for 7.5 years; now, I’m starting up an experimental Irish jam. You can read about it in a future article, probably! 🤞
This jam will be a fusion of live musicians and live tech. Part of this process currently involves me making a lot of tracks for a lot of tunes that
- need to be played back live, and
- need to be available for jam members on a private Drive for the sake of practice and/or reference.
The problem
I’m using FL Studio to export these tracks: as far as I’m aware, FL Studio can only export playlist tracks as WAV files, at least currently.
A brief aside: WAV files are “lossless” (more data), and as a result can quickly eat up space on the Drive. Also, because of their higher data density, they take longer times to load, the effect being particularly noticeable on poor connections, which I would rather assume most people have; MP3 files are “lossy” (less data), so they load faster and are more compact. And hey, you can upload waaaaay more MP3 tracks to a Drive than WAV files!
The solution
- A batch script with some techno-voodoo
- Some mucking around in the registries
- The LAME encoder
- A lot of tutorials / references for those three
FWIW, I had absolutely never done anything like this before, and now I feel dangerously empowered. ⚡⌨
Editing the Registries
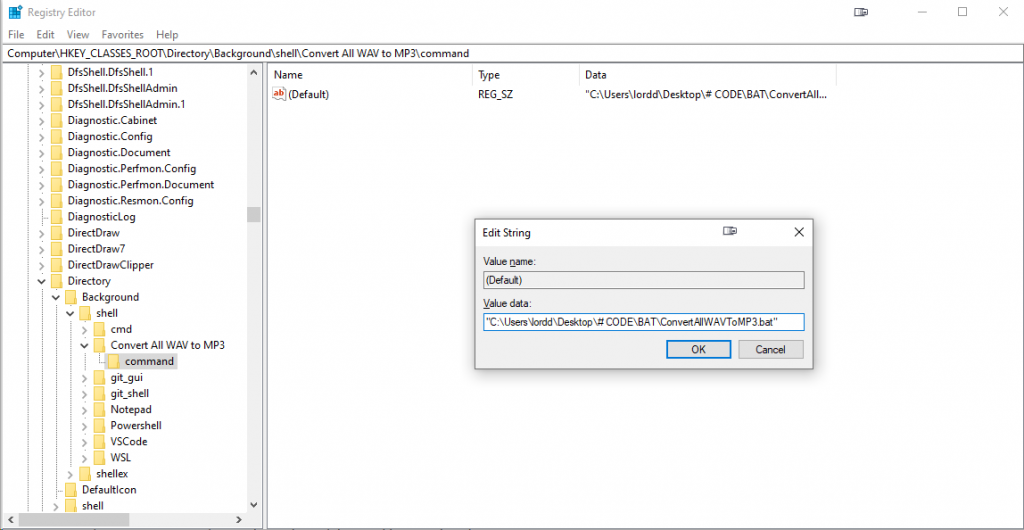
I only needed to edit HKEY_CLASSES_ROOT\Directory\Background\shell. This is where Windows looks for context-menu items (when no items are selected).
I simply added the Convert All WAV to MP3 key, making it available instantly, and then another key within, command, which fires the batch script, which we’ll make next.

The Batch Script
First, create a batch (.bat) file in a reliable place where you expect it to remain (i.e. where it is less prone to link rot). It doesn’t matter what you name it: just name it sensibly.
As you can see above, mine is located at "C:\Users\lordd\Desktop# CODE\BAT\ConvertAllWAVToMP3.bat".
Now, here’s what’s inside!
mkdir MP3Conversions
for %%I in ("*.wav") do lame "%%I" "MP3Conversions/%%~nI.mp3"
pause
Okay, so what’s going on here?
- We make the directory
MP3Conversions. - We iterate over each
*.wavfile in the directory in which you right-clicked, making a call to thelameencoder. (We’ll set that up later, don’t worry.) The first argument is wrapped in double quotes; the second argument is also wrapped in double quotes, but the ~n flag causes the extension to be dropped, and we just toss .mp3 onto the end. (Again, it will only convert WAV files in this directory, and none in any nested folders.) - Pause, JIC you need to inspectigate; remove this line if you don’t.
Note that I chose %%I arbitrarily: you could use another single letter, upper or lower case, and get the same result. However, variables are case sensitive, so consistency matters!
If you want to do this recursively (i.e find WAV files in nested directories), then change for %%I in
to for /R %%I in
The one caveat here is that any files with identical names will overwrite each other. So make sure your files are named uniquely at all levels!
The Lame Encoder
I downloaded a compiled, OS + architecture appropriate version of the LAME encoder from this page at RareWares. Since I have a 64bit version of Windows 10, I downloaded the one that says “Download x64 bundle(1214kB)“. Make sure you have at least these two files: lame.exe and lame_enc.dll.
I tossed them all (plus a free doc folder) in C:\lame, but you could place them somewhere else.

And then I added the folder’s PATH to my environment variables.

Bear in mind, that PATH should reflect where you placed your copy of the LAME, whether it’s in C:\lame like mine or somewhere else! Also, make sure you do not have a trailing slash ( \ ) at the end.
And that’s all there is to it! 😀 This was a fun project for me, and it’s definitely got me wondering what I can do next with little scripts like these. Hopefully this helps you do the same!
